
Third-party ROMs like CyanogenMod are the ultimate form of customization for softModders. Hard-working developers offer us alternate Android experiences to replace our often bloatware-riddled stock ROMs.
Installing custom ROMs is performed with a special type of software called a recovery. You may have heard of popular ones like ClockworkMod, or Team Win Recovery Project (TWRP). If you have an unlockable bootloader, injecting a custom recovery into your phone is quite simple. However, that's not the case for AT&T and Verizon Samsung Galaxy S4 owners.
The Case of the Locked Bootloader
The bootloader is the lowest-level piece of programming on your device, initializing the Android operating system upon boot. AT&T and Verizon have completely locked down the bootloader on their GS4s so that we can only run their version of the OS.
The situation was so dire, bounties were created for anyone that could offer a fully-unlocked bootloader. Unfortunately, they have yet to be claimed, with the Verizon GS4 bounty still sitting at just under $4,000!
Being able to install a custom ROM has been largely impossible on locked phones, but a developer by the name of Hashcode has created a special custom recovery called Safestrap, which works alongside locked bootloaders. It's not a perfect solution, but it certainly gets us close.
Step 1: Complete These Prerequisites
In order to get the Safestrap recovery onto your AT&Tor Verizon Galaxy S4, you'll need to knock some prerequisites out of the way:
- Root your GS4
- Enable "Unknown sources"
Also, ensure that you don't have Android's Encryption option enabled. You can check this under Settings -> More -> Security -> Encrypt device.
Step 2: Download the Correct Safestrap APK File
Find the correct Safestrap version below for your Galaxy S4's build number. If you don't know what your build number is, head to your GS4's Settings -> More -> About device. Scroll down to Build number and take note of the last three digits.

Download the appropriate version below directly onto your Galaxy S4, or download to your computer and transfer it over.
AT&T Models:
- MK2 build (Android 4.3): Safestrap-JFLTEATT-3.71.apk
- MF3 build (Android 4.2.2): Safestrap-JFLTEATT-3.65.apk
Verizon Models:
- MJ7 or MK2 build (Android 4.3): Safestrap-JFLTEVZW-3.71.apk
- MI1 or ME7 build (Android 4.2.2): Safestrap-JFLTEVZW-3.65.apk
Step 3: Install Safestrap on Your GS4
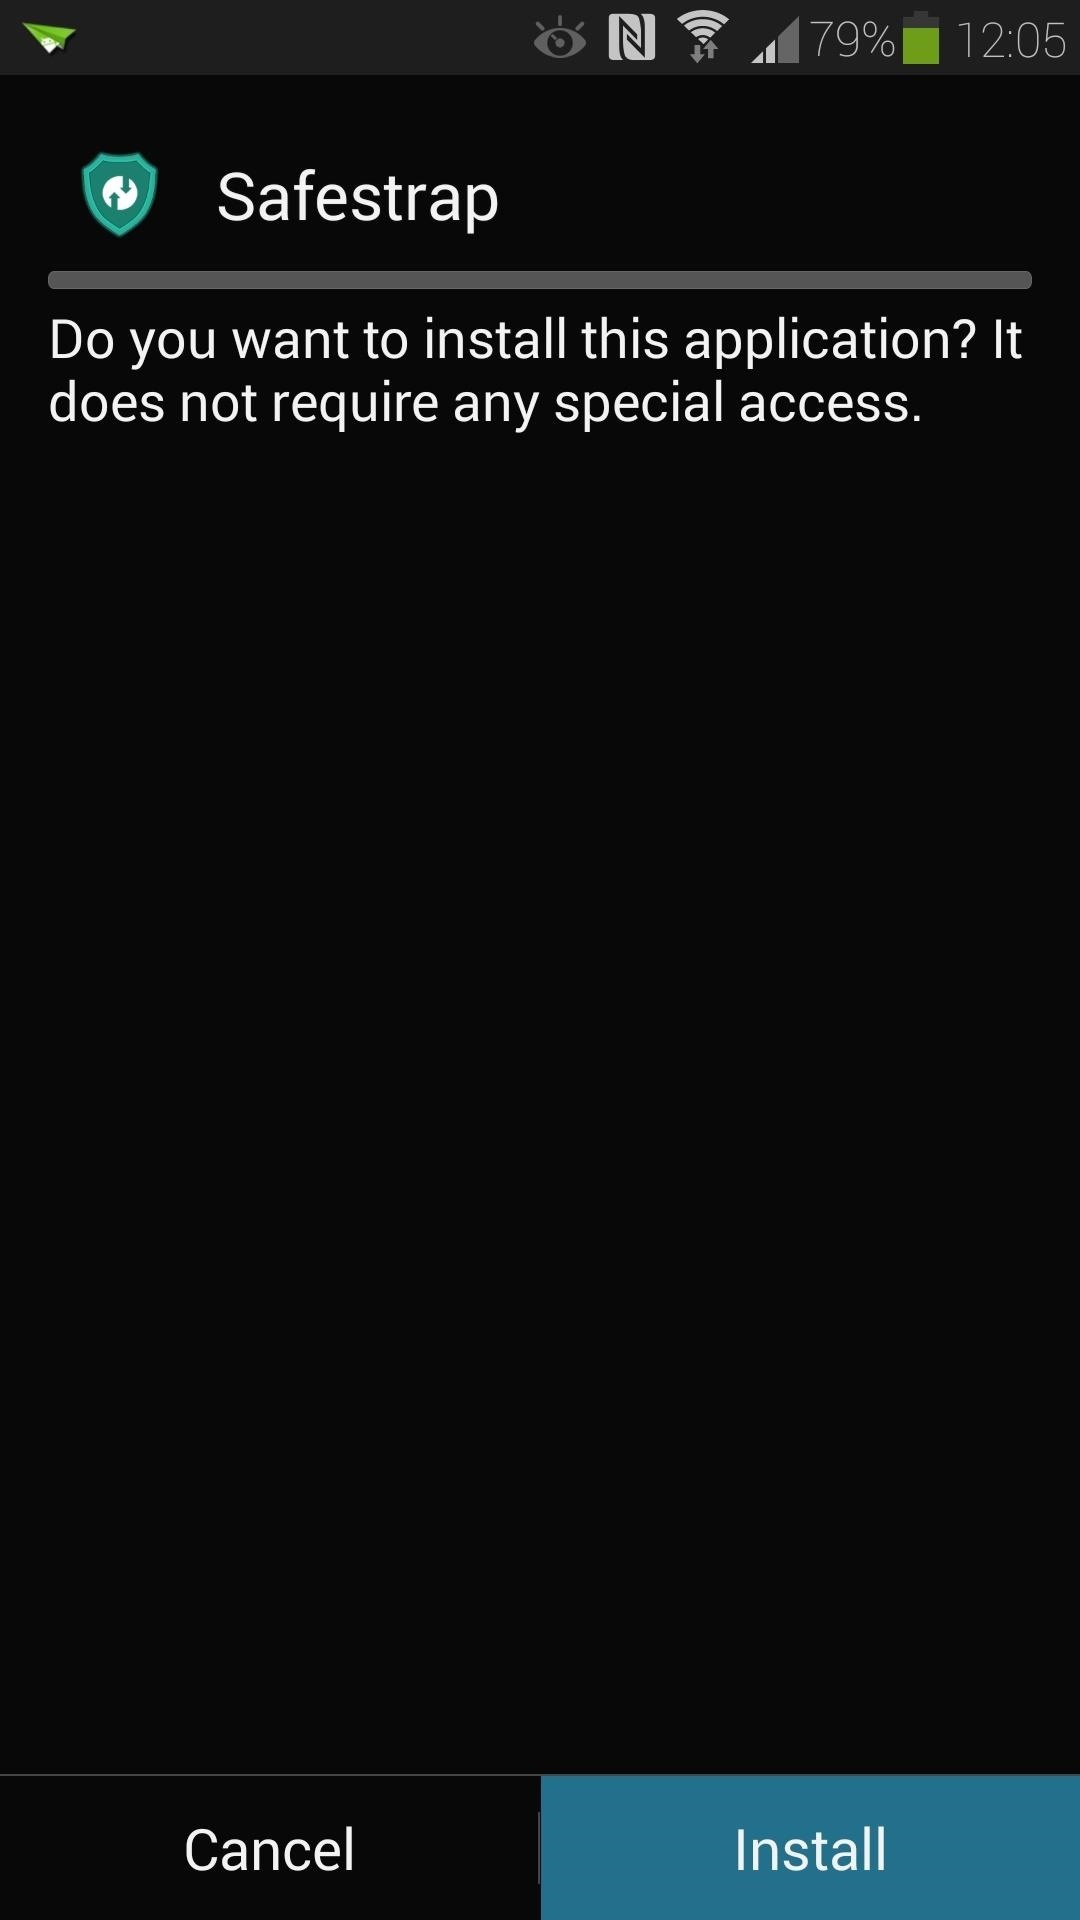
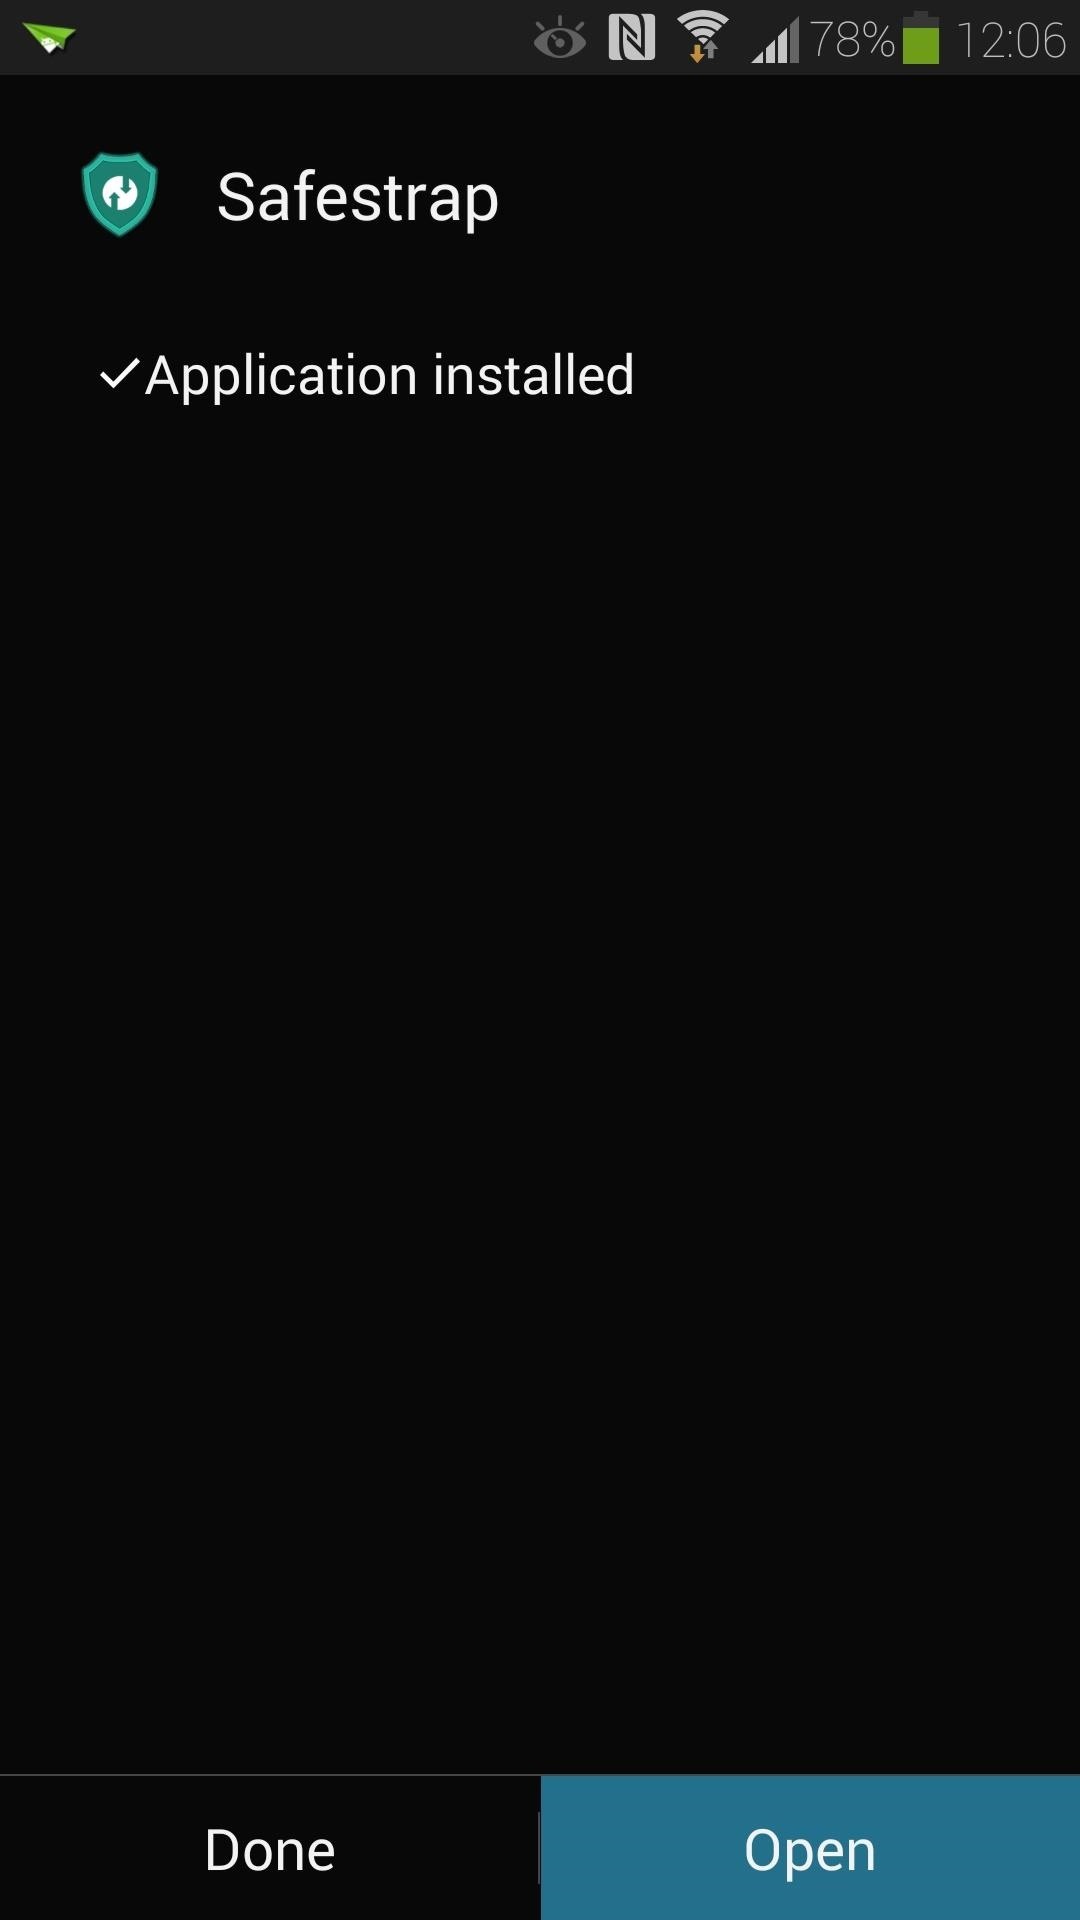
Open up the .apk file from your downloads folder to start the installer. Tap the Install button, then Open once it finishes.
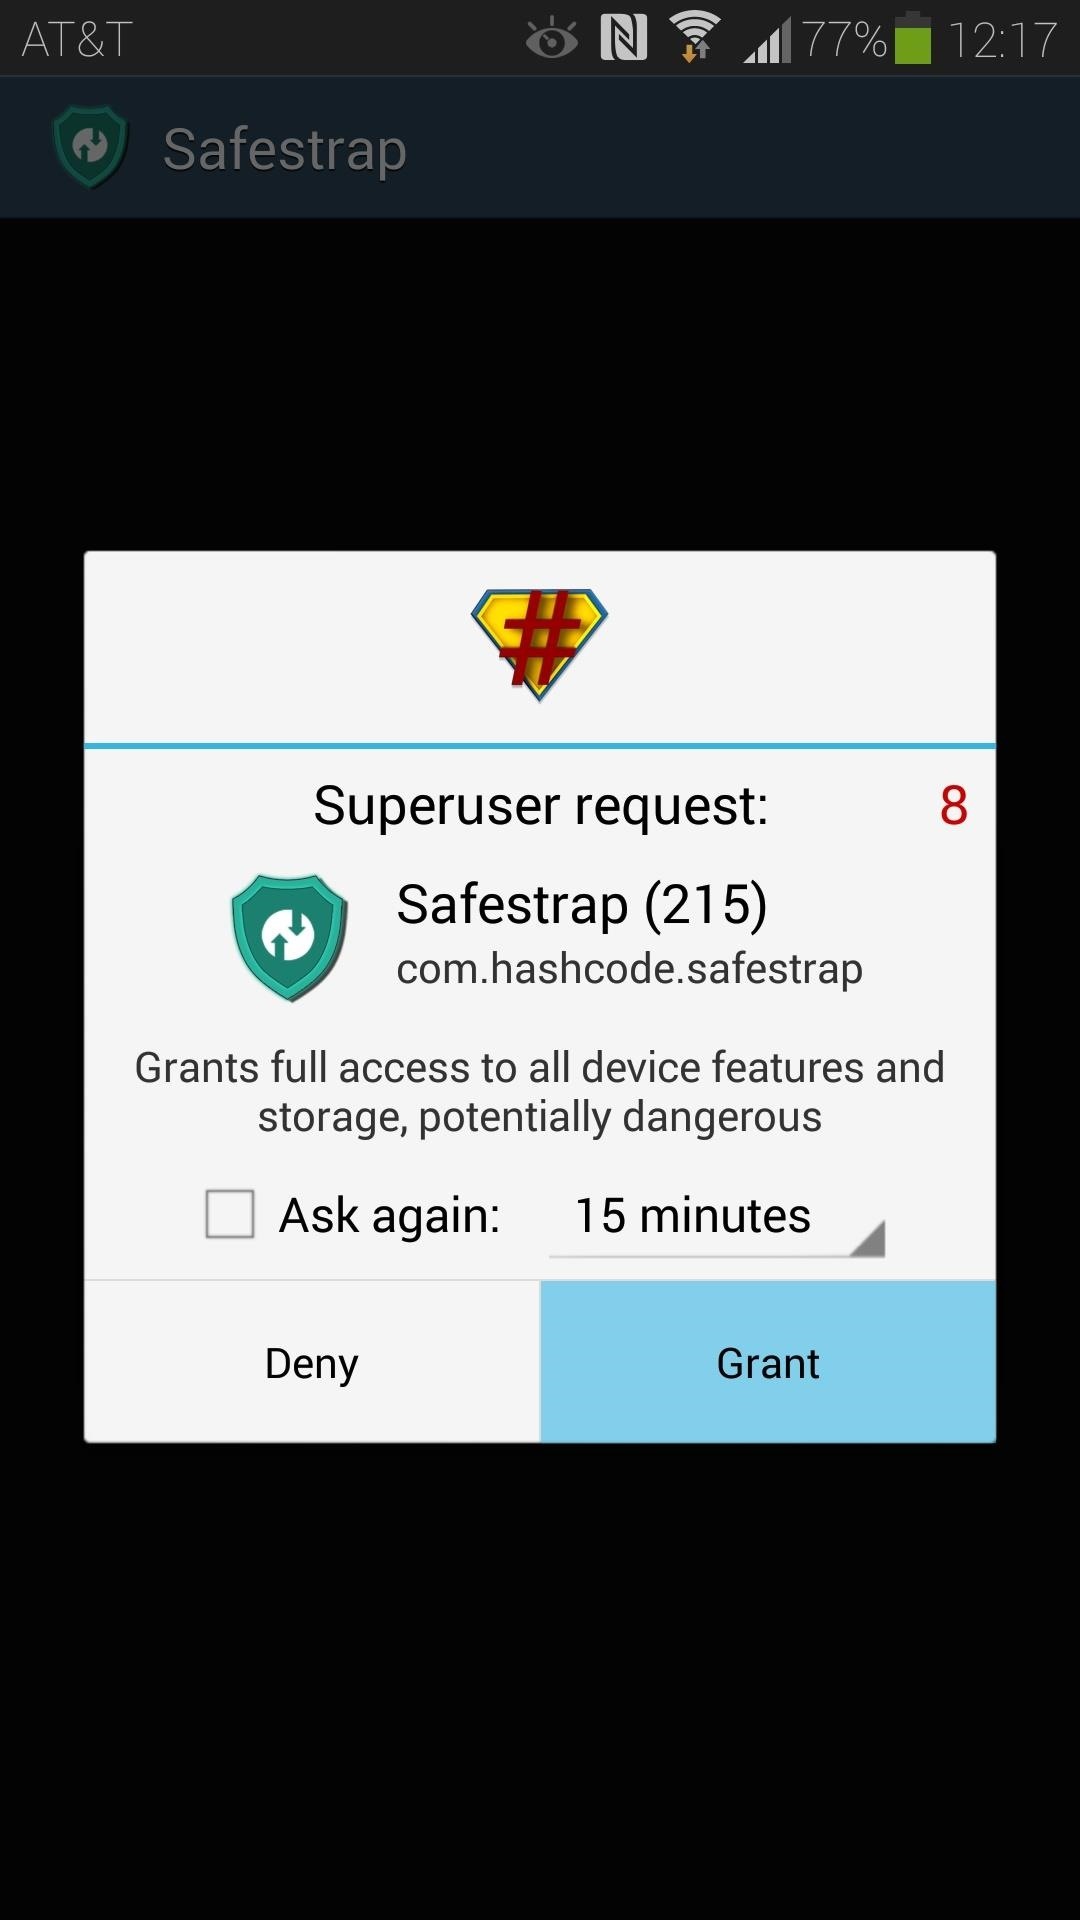
When it first opens, you'll need to grant Safestrap superuser access, then agree to the disclaimer. Tap the Install Recovery button.

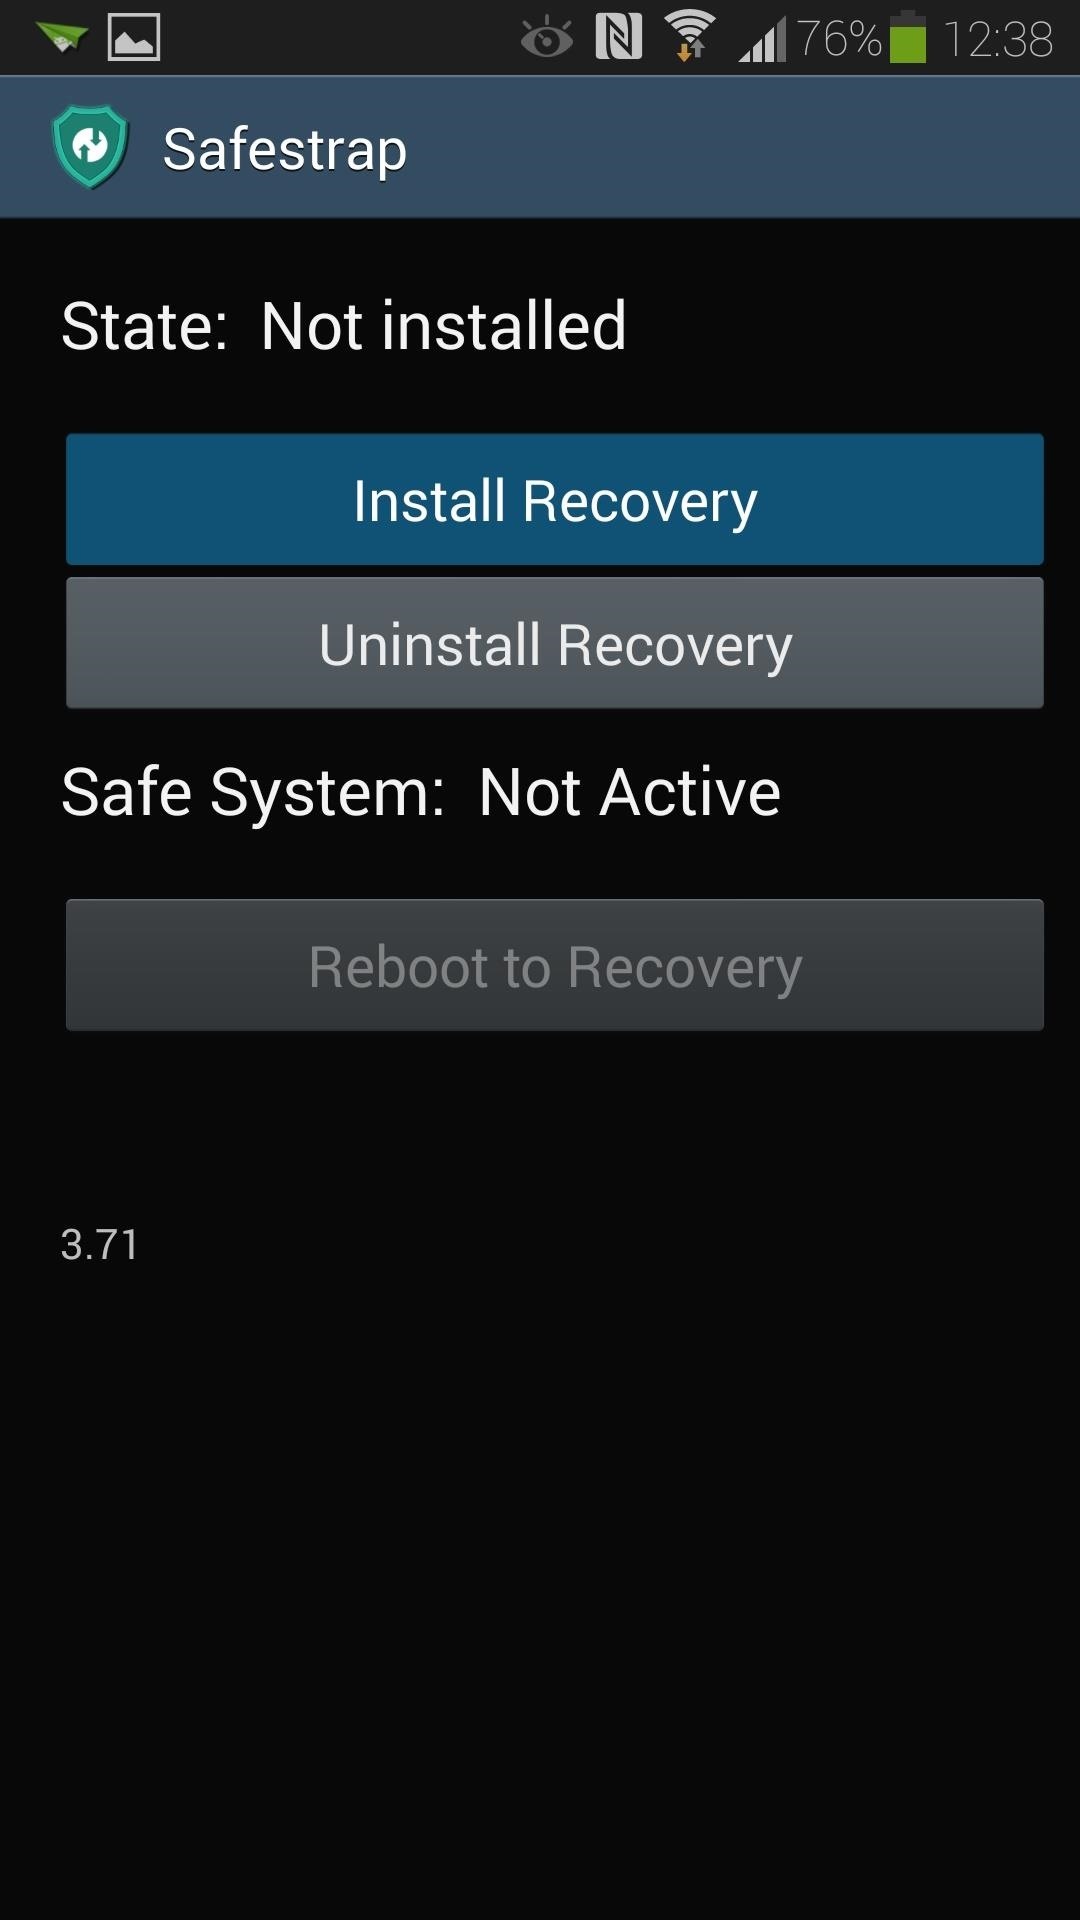
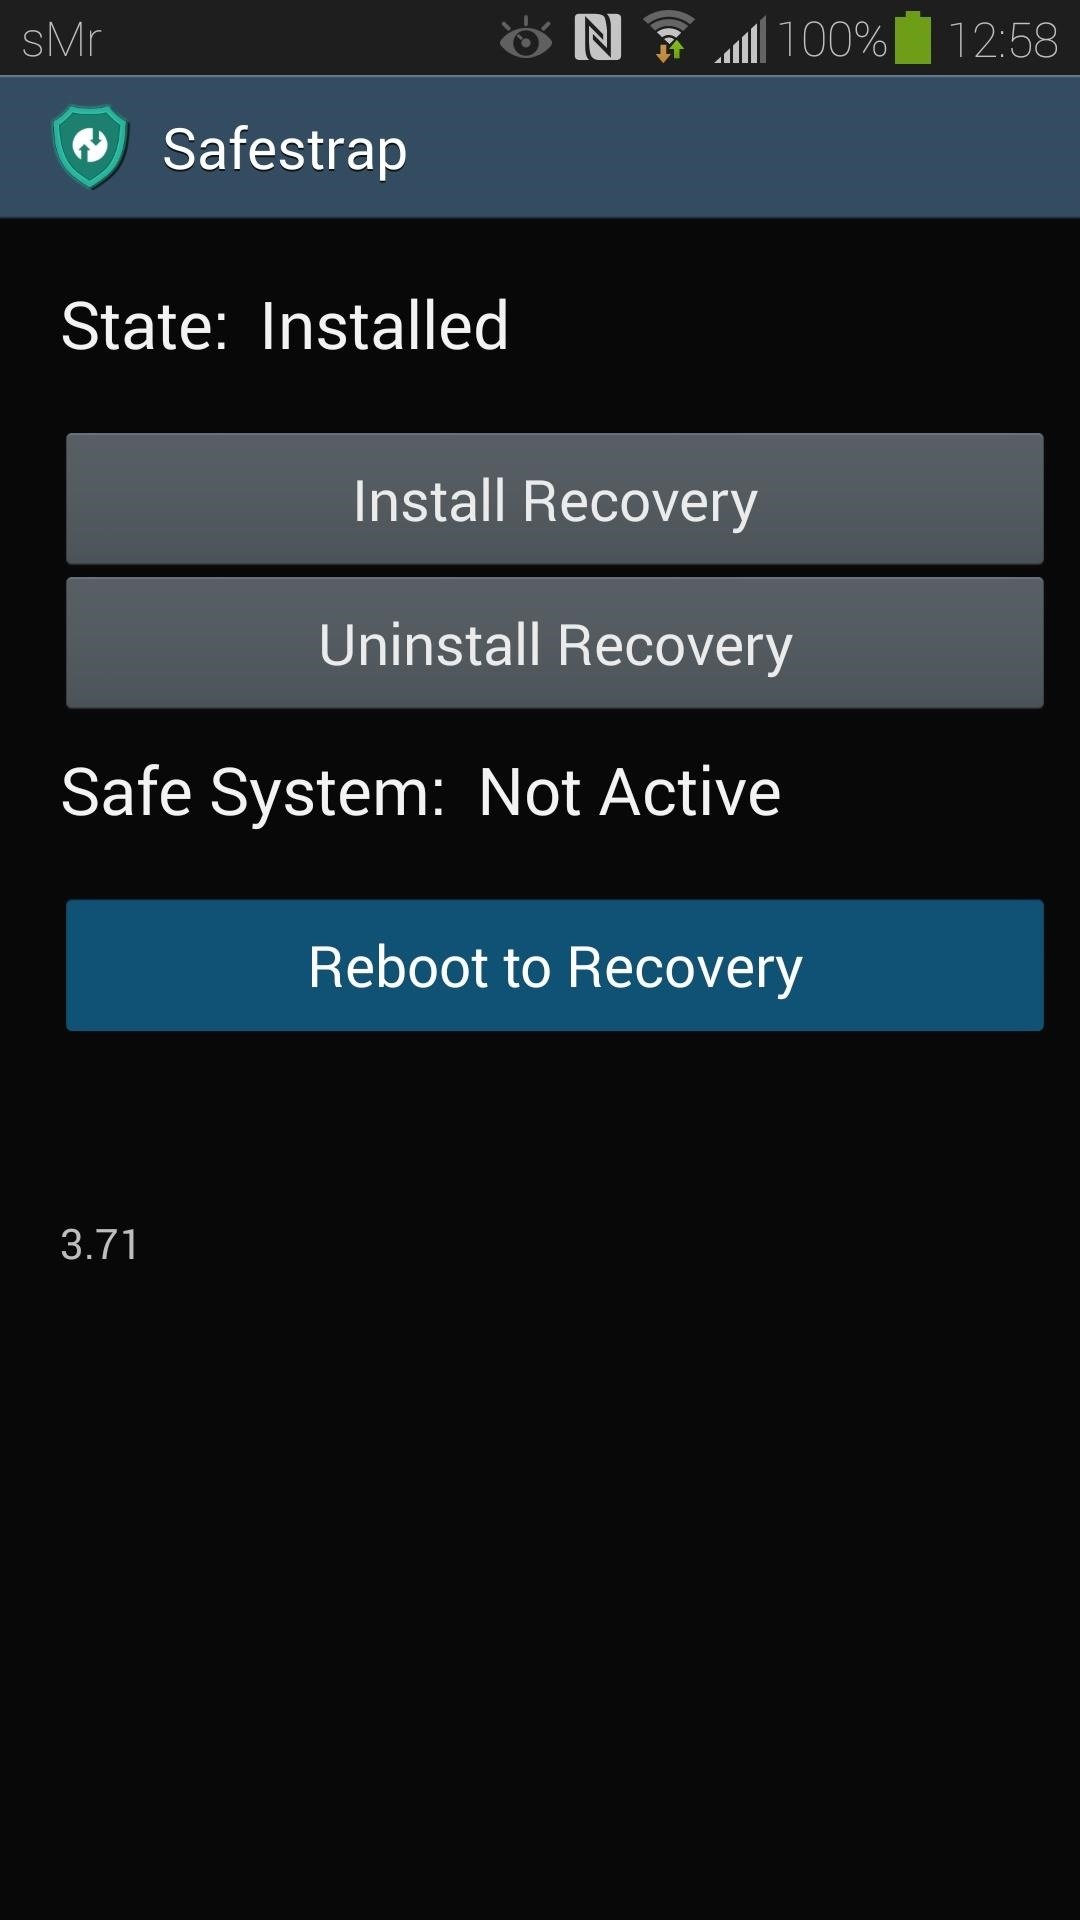
It's as simple as that! The "state" should stay Installed, and you now have a custom recovery on your phone. If you later on find that flashing custom ROMs isn't for you, you can remove Safestrap with the Uninstall Recovery button.
Step 4: Choose a Custom ROM
Unfortunately with our bootloader situation, we can only flash TouchWiz-based ROMs. Sadly, that means no ROMs based on Android Open Source Project (AOSP), like CyanogenMod or ParanoidAndroid. Check out these threads on XDA for a list of Safestrap-compatible ROMs:
- Verizon Galaxy S4 ROMs
- AT&T Galaxy S4 ROMs (see the section titled ROMs from AT&T Forum)
You also need to make sure that the ROM you choose matches the Android version that you have on your stock system. If you're running Android 4.2.2, you need a ROM with Android 4.2.2. Likewise, if you have Android 4.3, you're going to need a ROM with Android 4.3.
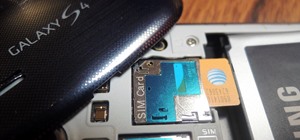
Download your chosen ROM's .zip file onto your Galaxy S4's external SD card. To keep things organized, I recommend making a separate folder to keep all your ROMs and mods that you need to flash.
Step 5: Choose a Custom Kernel
In addition to the ROM, you'll also need to download a kernel module which will ensure that your GS4's radios (Wi-Fi, Bluetooth, etc.) work properly. Grab the kernel module specific to your build number here:
AT&T Kernel Modules:
Verizon Kernel Modules:
Make sure you have both your ROM .zip file and kernel module on your external SD card.
Step 6: Boot into Safestrap Recovery
There are two ways to boot into Safestrap Recovery:
- Simply open up Safestrap from your app drawer and tap the Reboot to Recovery button.
- Reboot your phone like normal, and you'll be greeted by a Safestrap splash screen. As long as you have Safestrap installed, this screen will appear every time your GS4 boots up. Tap on Recovery at the bottom left. For a normal boot-up, you can just tap Continue or leave it alone for ten seconds.
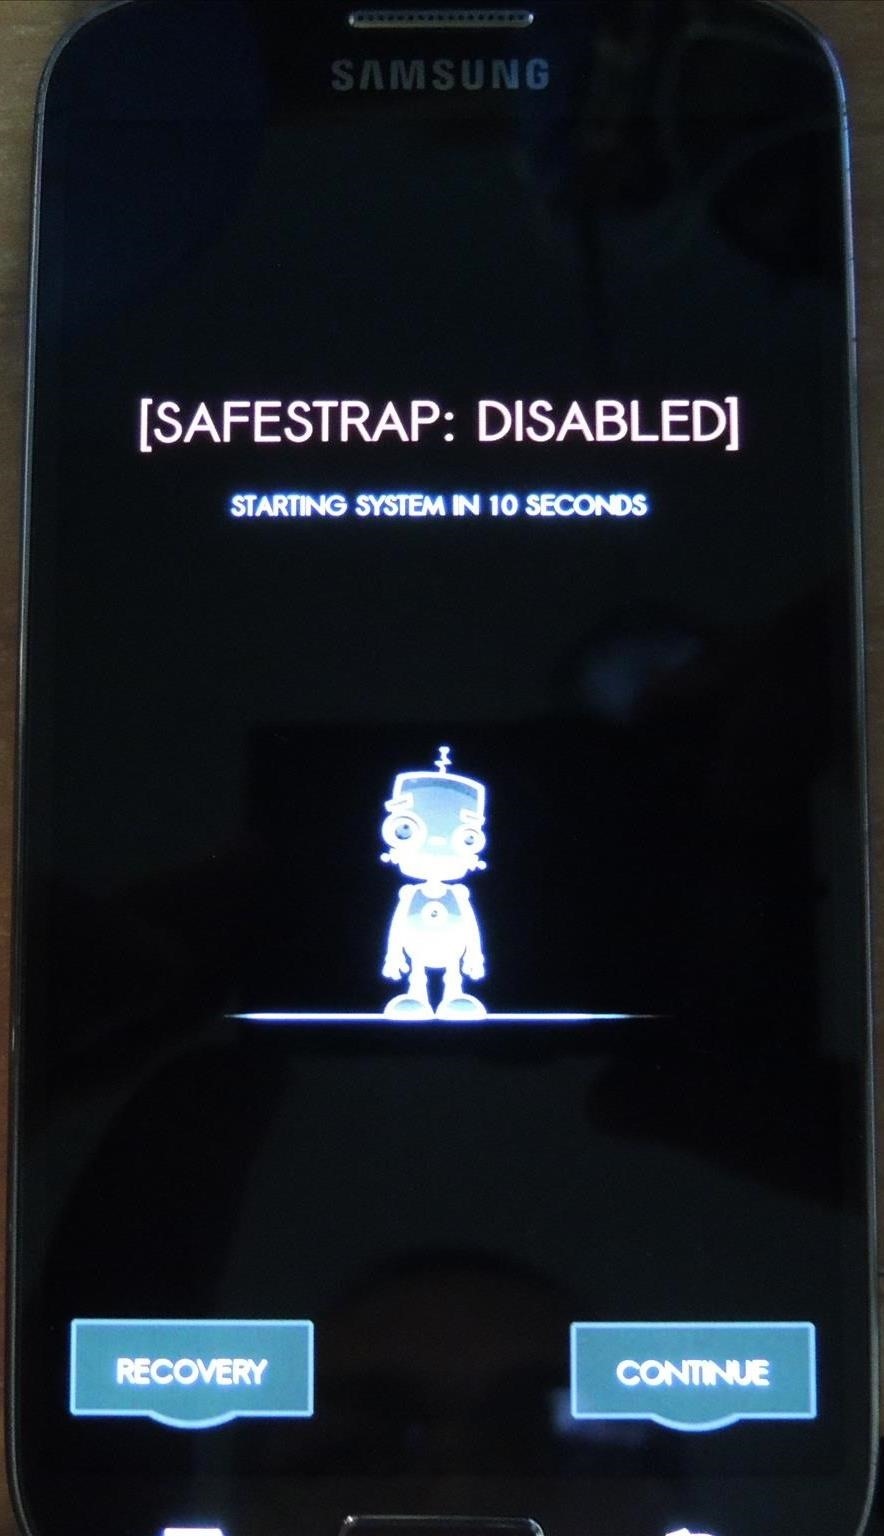
Either method will take you to the Safestrap recovery screen.
Step 7: Create a Backup
A vital step to perform before flashing any custom ROM is making a full nandroid backup which you can easily restore in case anything goes wrong.
A nandroid is a complete snapshot of all the data on your device, including your apps, text messages, even all the way down to the cookies stored by your internet browser. Everything is backed up, and everything is easily restored. In this step we'll make a nandroid backup of our stock TouchWiz ROM.
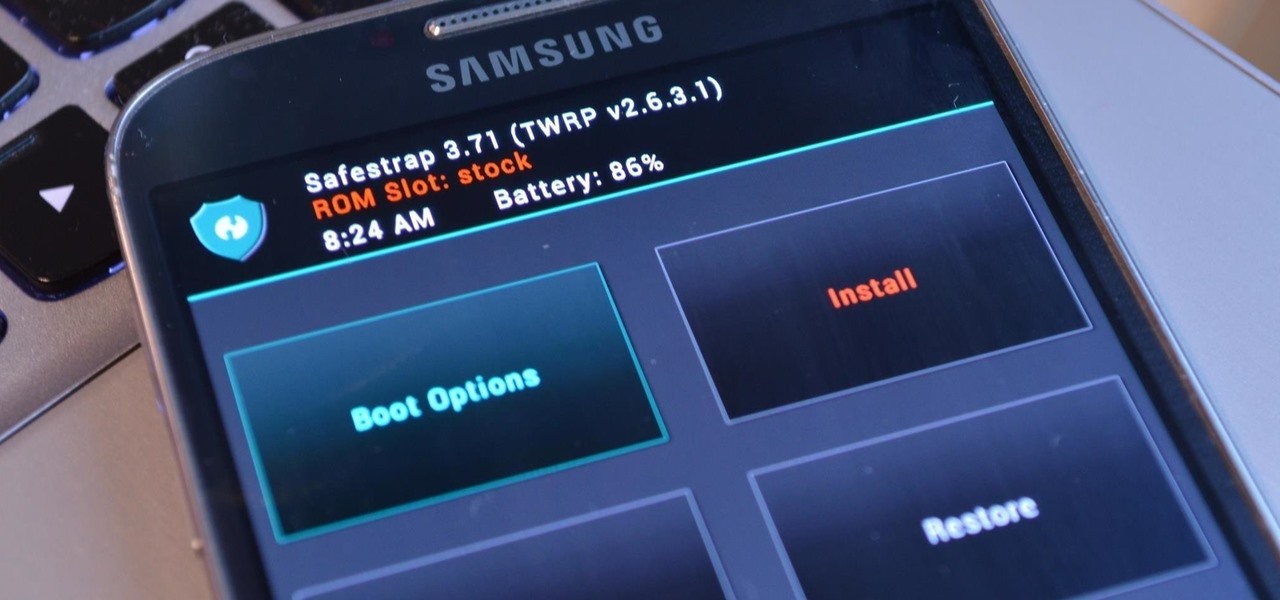
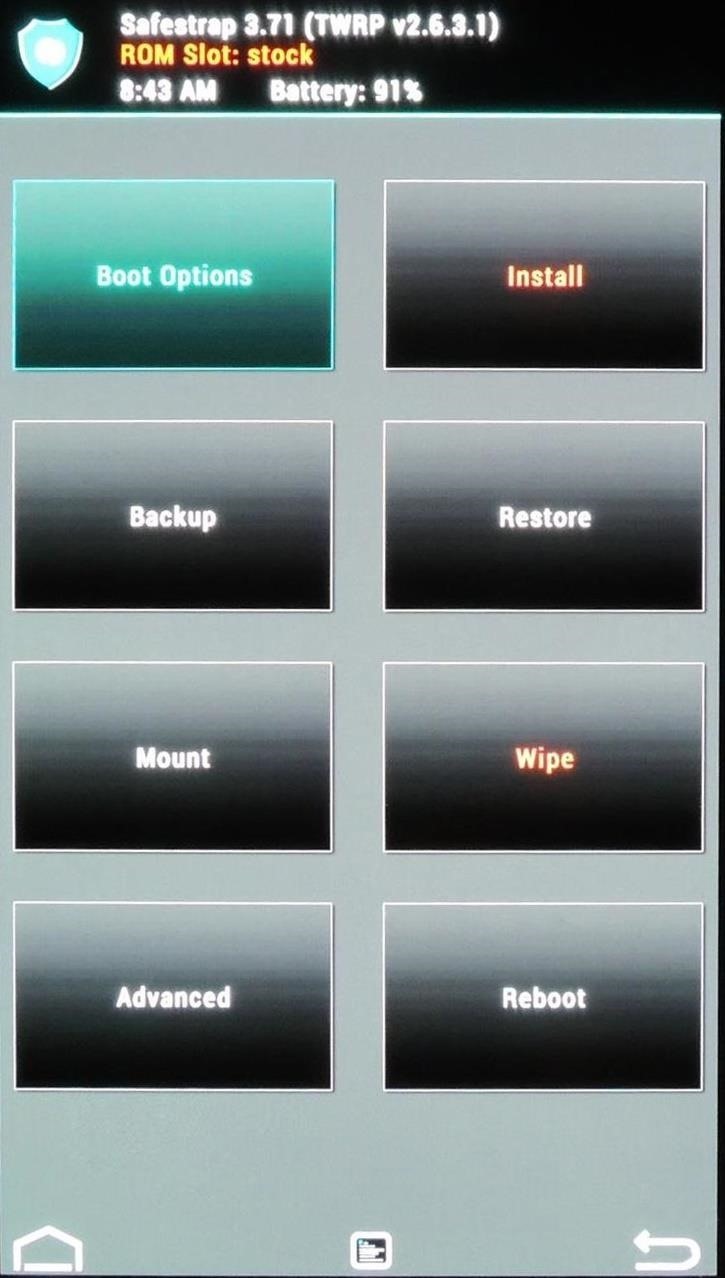
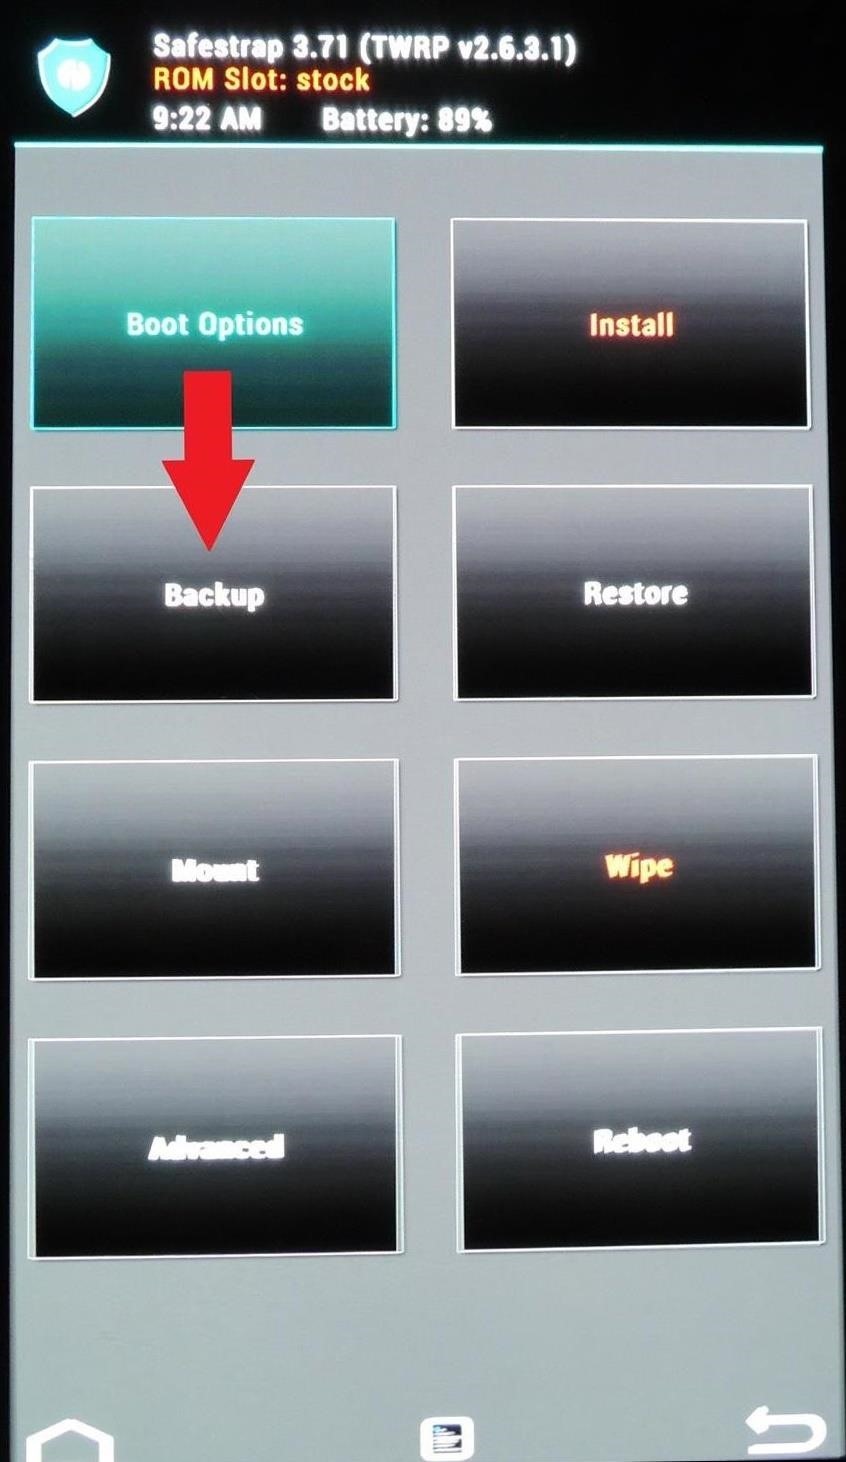
At the very top of the recovery screen, you'll see that it says in red text ROM Slot: stock. Safestrap works by creating virtual ROM slots on which you can install custom ROMs, sort of like partitions on a hard drive.

You can perform backups, restores, and installs on these slots. Any action you take will be directed at whichever slot is designated active at the top. By default, it's your stock ROM slot.
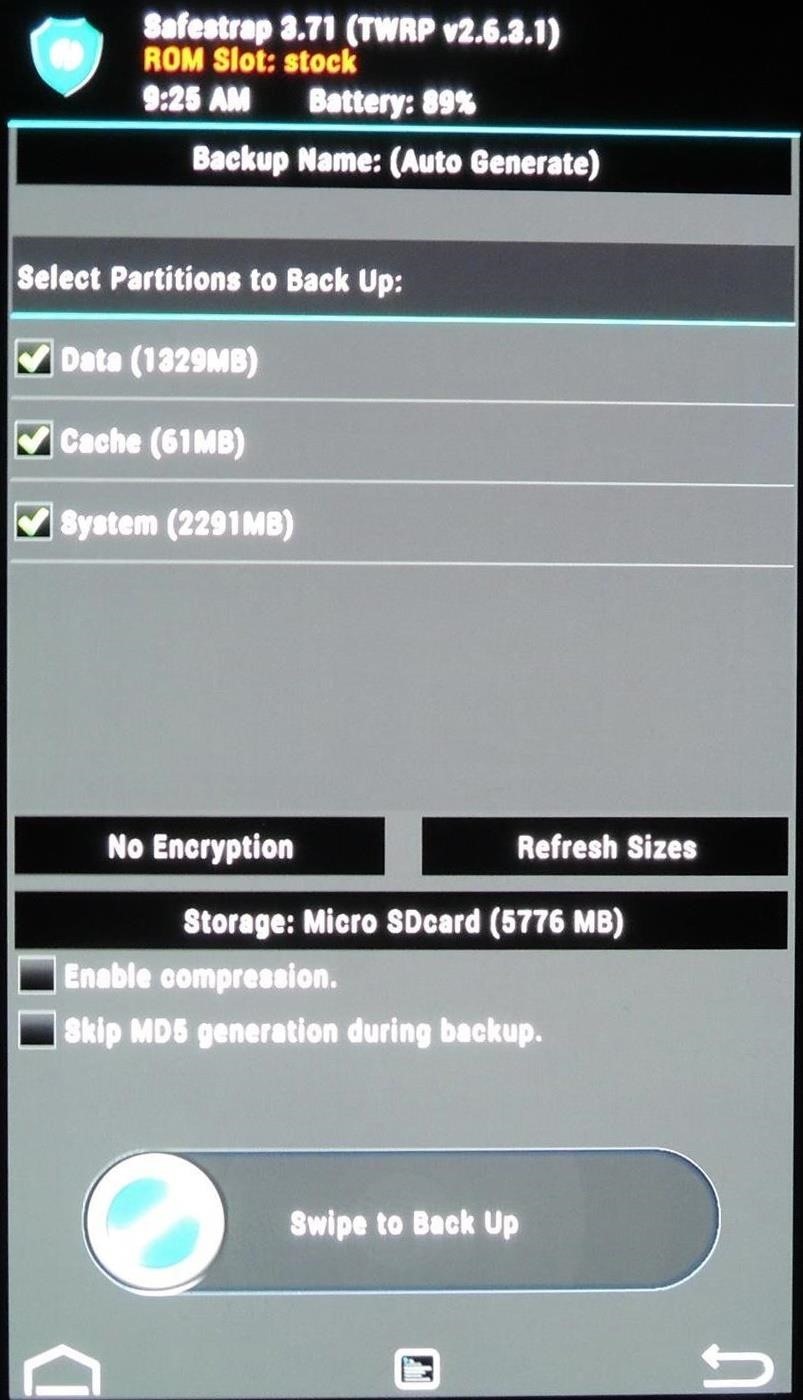
Making Your Backup with Safestrap
To make a nandroid, select the Backup button and make sure that all three partitions (data, cache, and system) are checked. At the bottom, swipe the button to the right to start the backup, which will be stored on your external SD card.
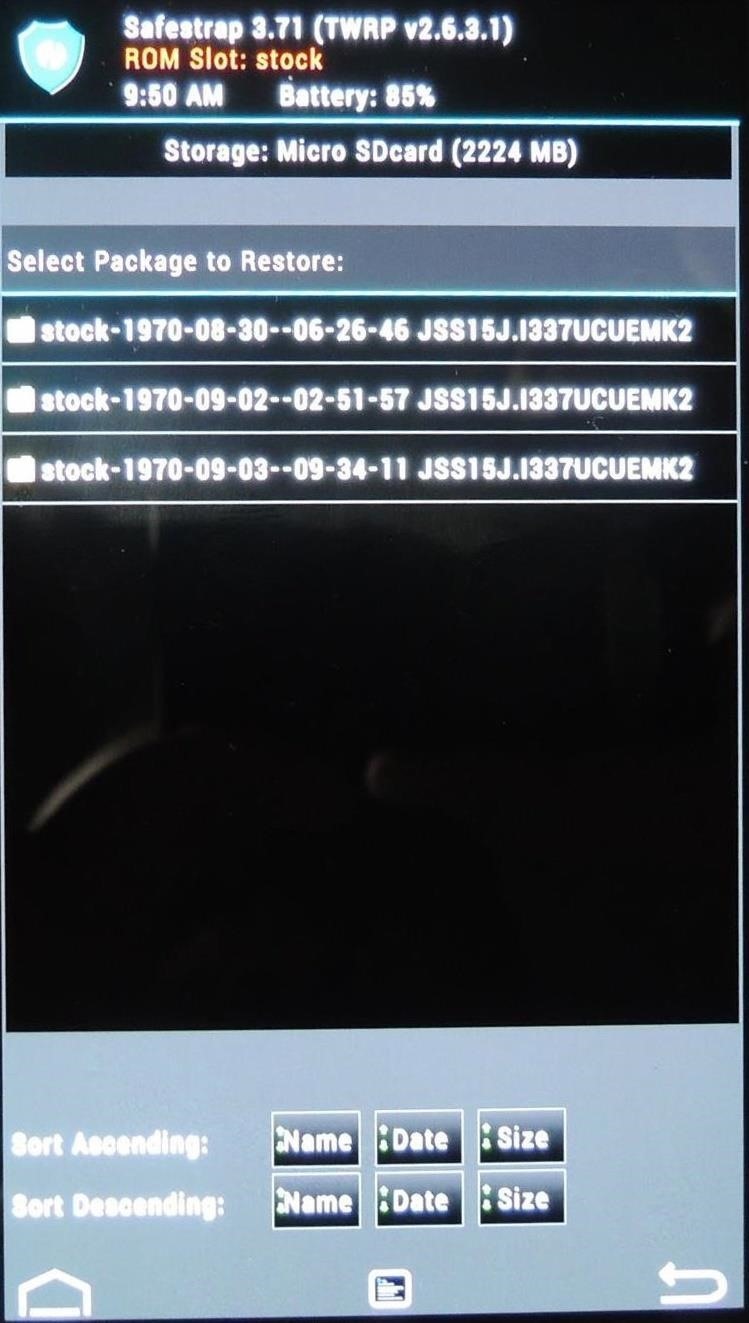
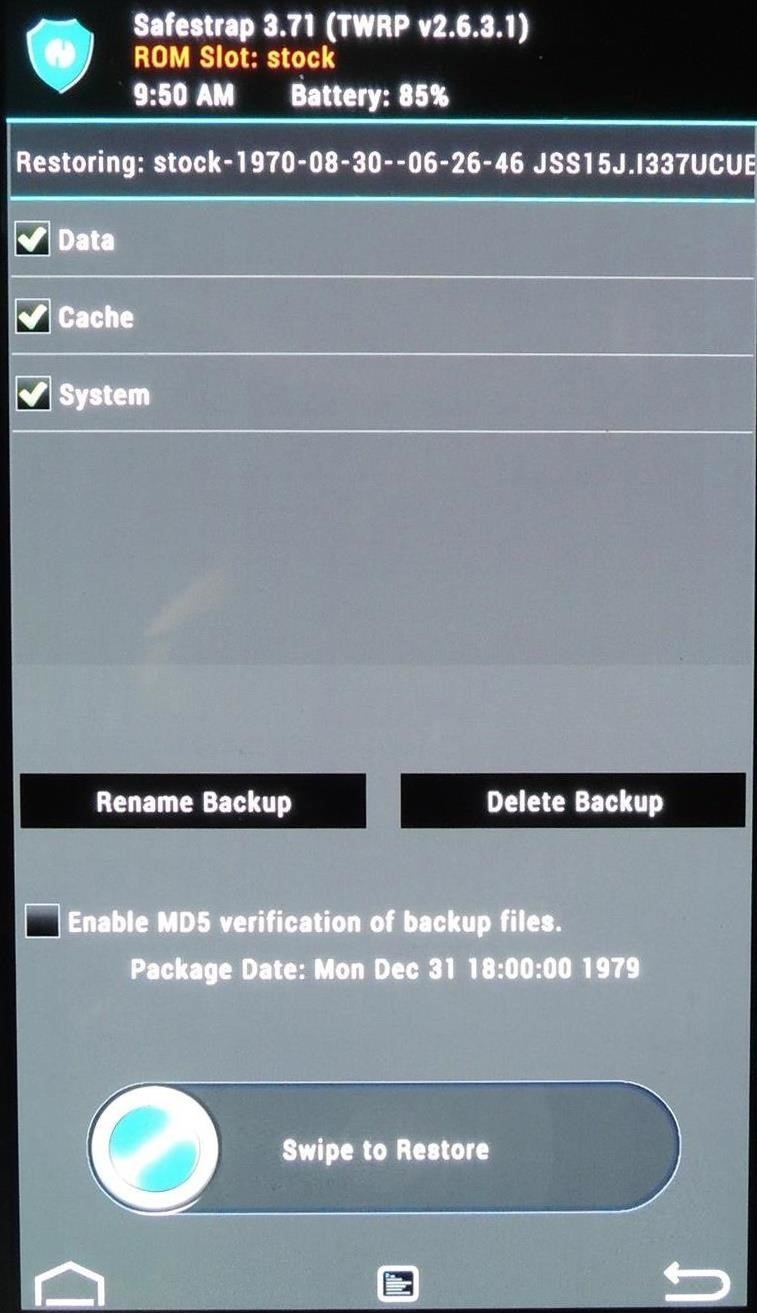
Restoring from a Backup with Safestrap
To restore a backup, tap the Restore button, select your backup file, make sure all partitions are checked, the swipe the button to the right.
Now that you know how to create and restore nandroid backups, we can start flashing new ROMs!
Step 8: Create a ROM Slot
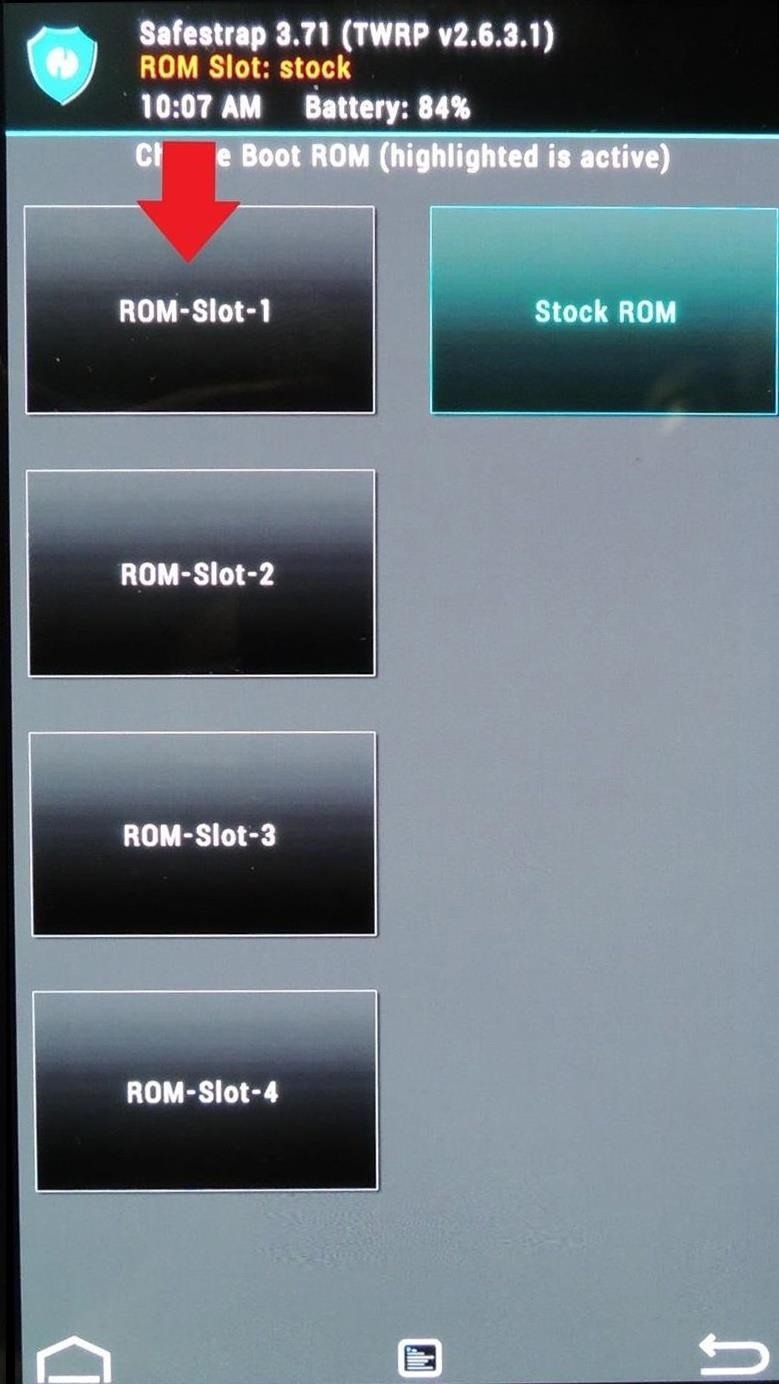
From the main page, select Boot Options, then ROM-Slot-1. Here you'll need to decide how much space you want the slot to take up. In most cases, you should leave System partition size and Cache partition size alone. You can use the plus (+) and minus (-) buttons to change Data partition size (where your apps, pictures, texts, etc. are stored) up to 4000MB (4GB).
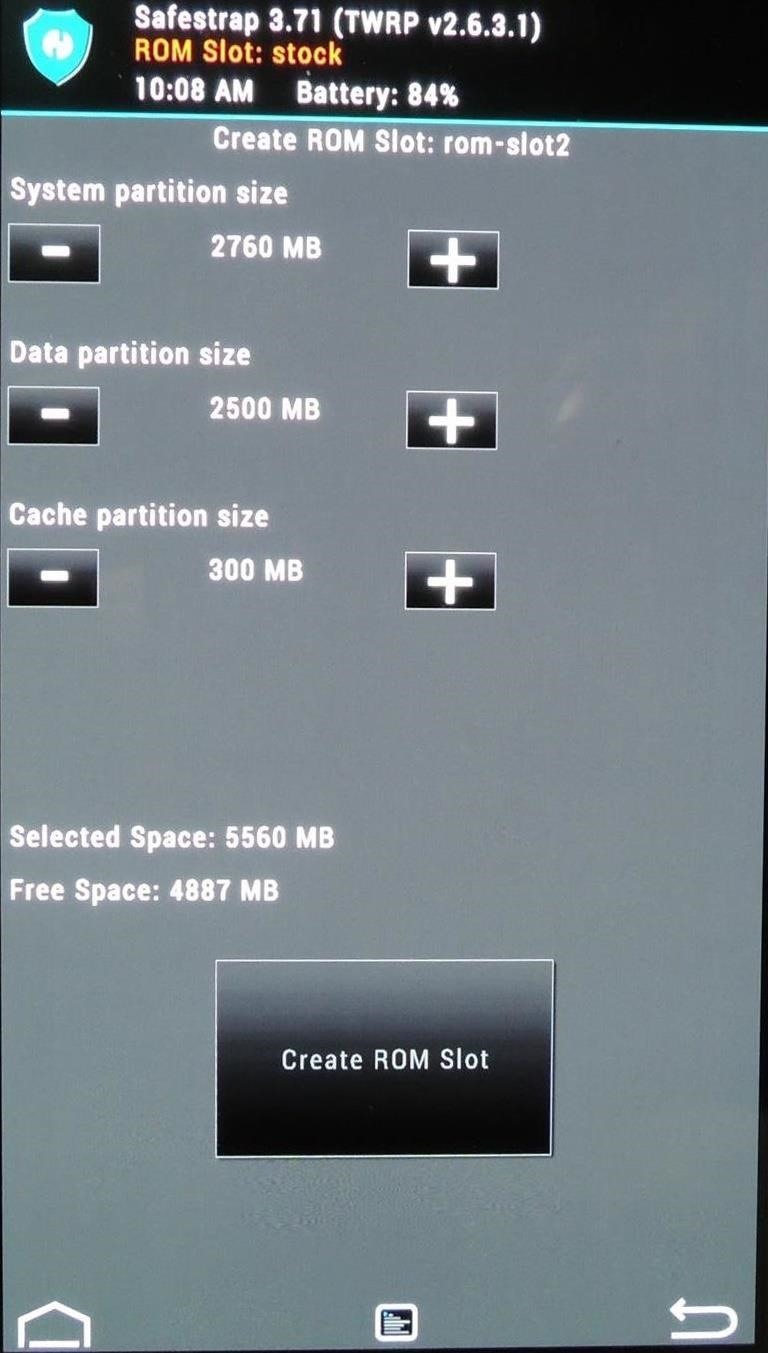
You can see how much Free Space you have, so make sure the Selected Space doesn't exceed it. Hit the Create ROM Slot button when you're done.
Step 9: Flash Your Custom ROM
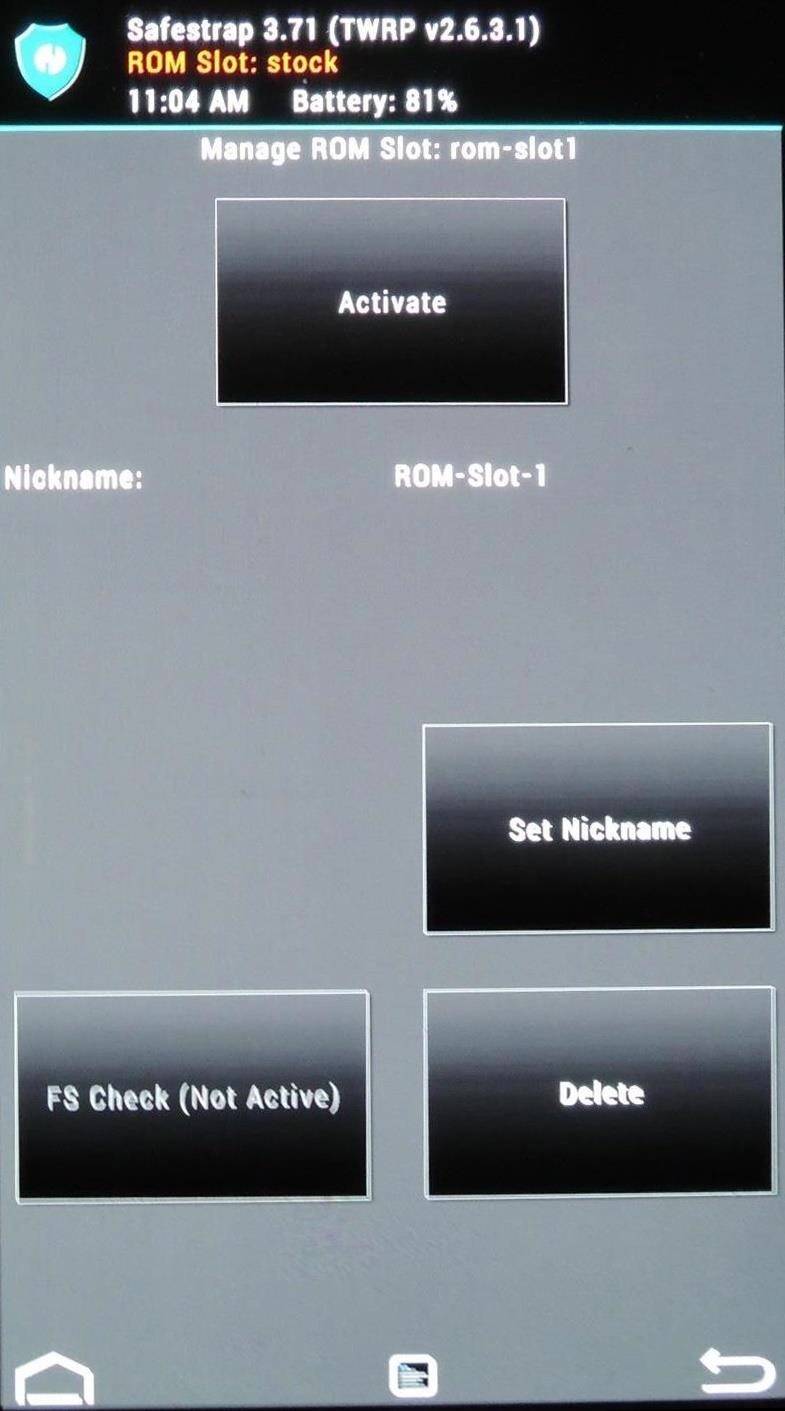
Now that your ROM slot has been created, you can activate it. From Boot Options, select the ROM slot, then hit the Activate button. Verify that it's active by making sure it says ROM Slot: rom-slot1 in green at the top.
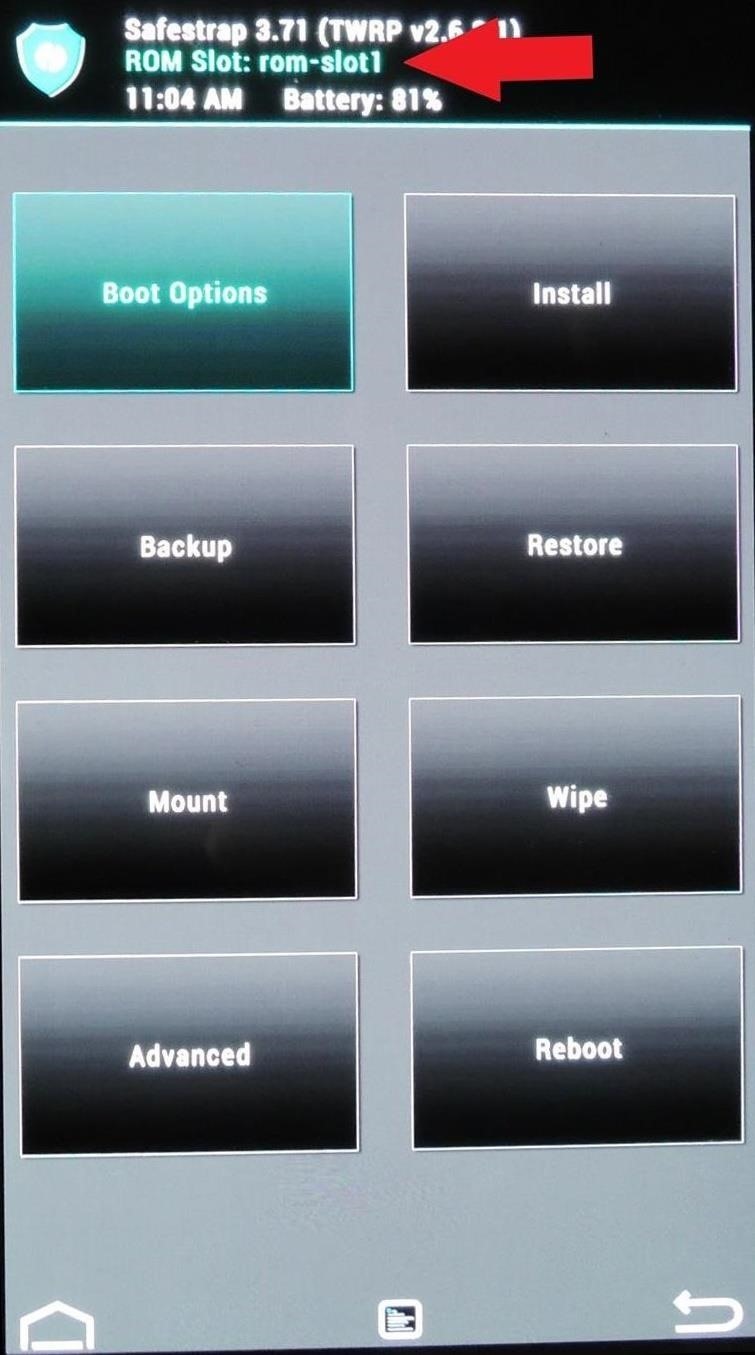
Since this is a brand new ROM slot, you can just go straight to Install.

However, for future reference, if you want to re-use a ROM slot (perhaps you tried out one ROM and didn't like it), you'll need to perform a Wipe before installing a new ROM. Simply hit the "Wipe" option and slide across to do a factory reset, after which you'll have a clean slate to work with.

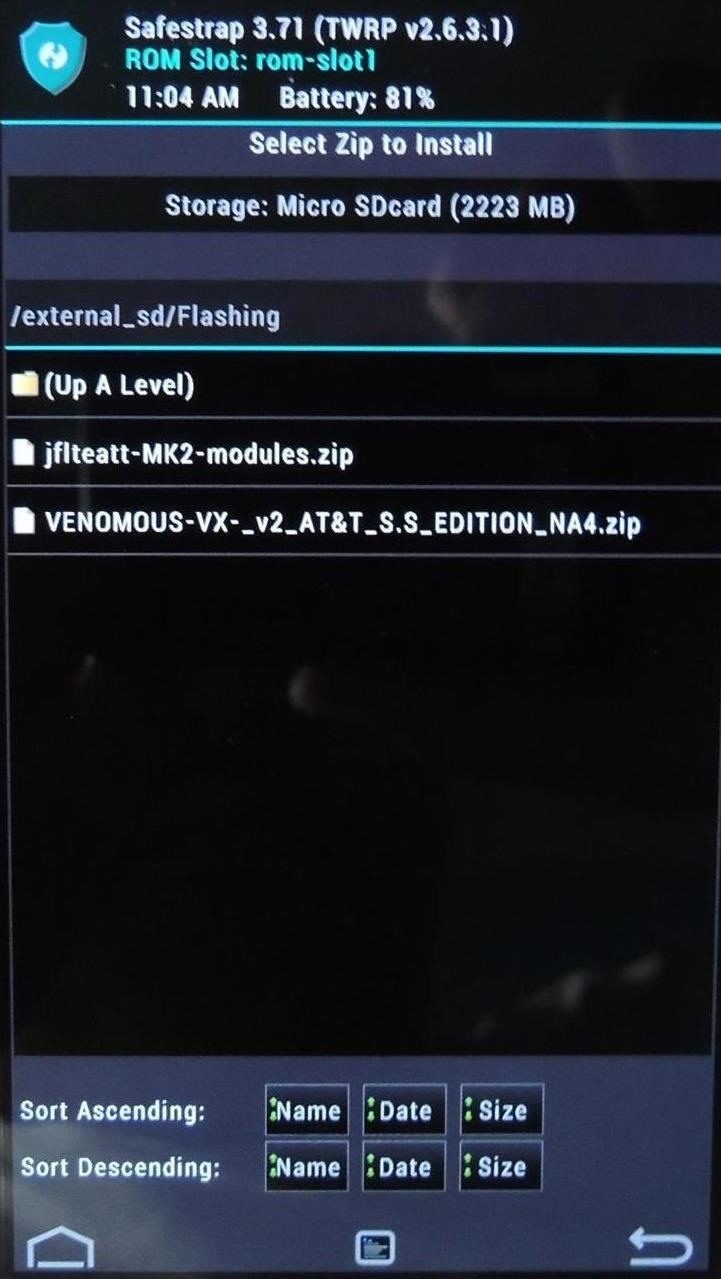
Once you're at the Install page, select your ROM's zip file. You'll also need to flash the appropriate kernel module, so select Add More Zips at the next page to add it to the queue.
Be sure to also read the installation instructions for your particular ROM; some developers optimize ROMs specifically for Safestrap recovery and already include the kernel module in the ROM .zip file. If that's the case, you will only need to flash the ROM file.
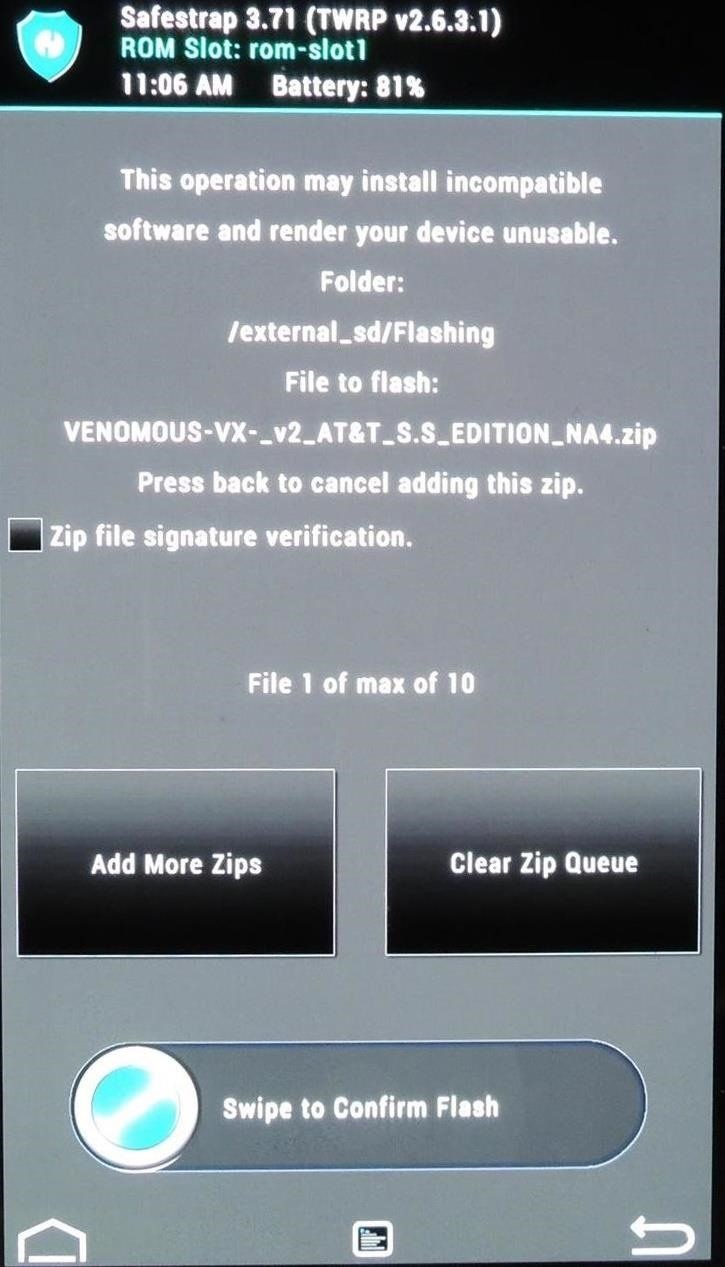
Once you have both .zip files in the queue, swipe the bar at the bottom to confirm the flash. When it finishes, you can back out to Safestrap's main menu. Select Reboot, then System to boot into your new custom ROM.
Step 10: Enjoy Your New ROM!
Upon installation of a new ROM, you may notice that it takes a while to boot up. This is completely normal, so no need to worry. Set your phone aside for a few minutes, let everything boot up, then come back to sign in with your Google account.
You'll need to re-install the Safestrap APK file in your new ROM—the actual recovery is still installed, this is just so you can easily boot into it.
If you want to switch back to your stock ROM, boot into Safestrap recovery, go to Boot Options, select Stock ROM, then Activate it. Verify that it says ROM Slot: stock in red at the top of the screen, go to Reboot, then System.
Even among experienced ROM flashers, Safestrap can be intimidating and confusing, but you have all the tools to get comfortable flashing with it. If you have any questions, feel free to ask away in the comments section below.
Just updated your iPhone? You'll find new emoji, enhanced security, podcast transcripts, Apple Cash virtual numbers, and other useful features. There are even new additions hidden within Safari. Find out what's new and changed on your iPhone with the iOS 17.4 update.


4 Comments
I finally got to where the rom is installed but, the device will just boot up into my stalk even tho I have the rom 1 selected. Any tips?
Upgrade sasafestrap to 3.75, I had the same issue and it fixed it.
I've got at&t galaxy s4 sgh-I337. But the build number is KOT 49H.I337UCUFNB1. Now what. I'm wanting to install the echoe rom from th s5. Now what? Which safestrap & which module / kernel? Thanks.
hi. i need ur help........i follow those steps but when i reboot my phone once, it does not start but it give the option of reboot again......when i reboot it again it also give again the option of reboot......what is
a solution?
Share Your Thoughts